-
Notifications
You must be signed in to change notification settings - Fork 39
Web XR
If you want to create a Web XR only project you can follow the following steps, most are identical to the basic project in tutorial 2.
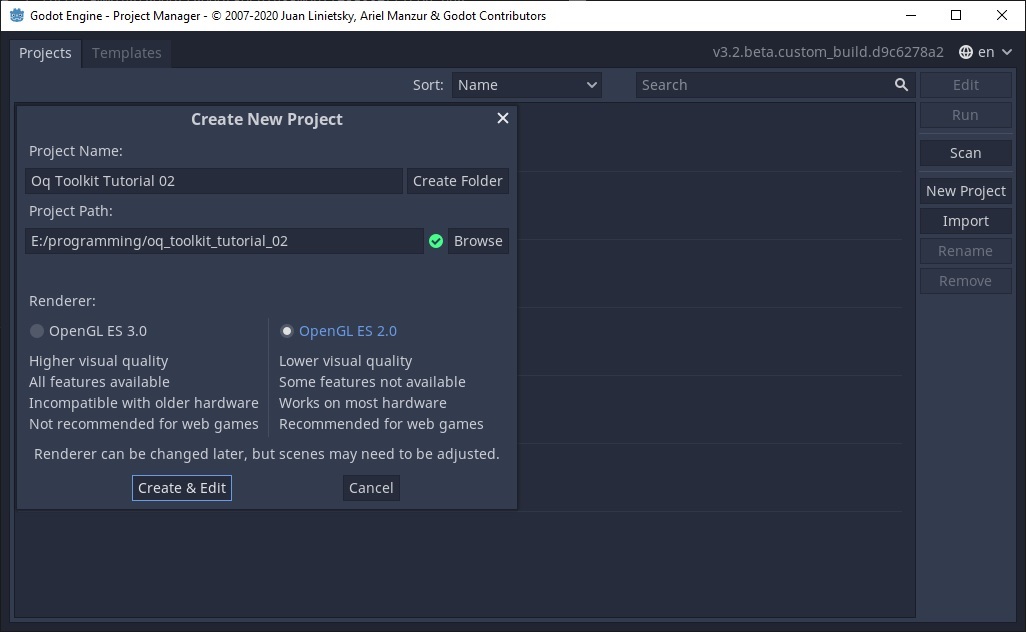
First create a new project using the Godot Project Manager selecting OpenGL ES 2.0 as Renderer:
Create a 3D Scene as root node and save it GameMain.tscn:
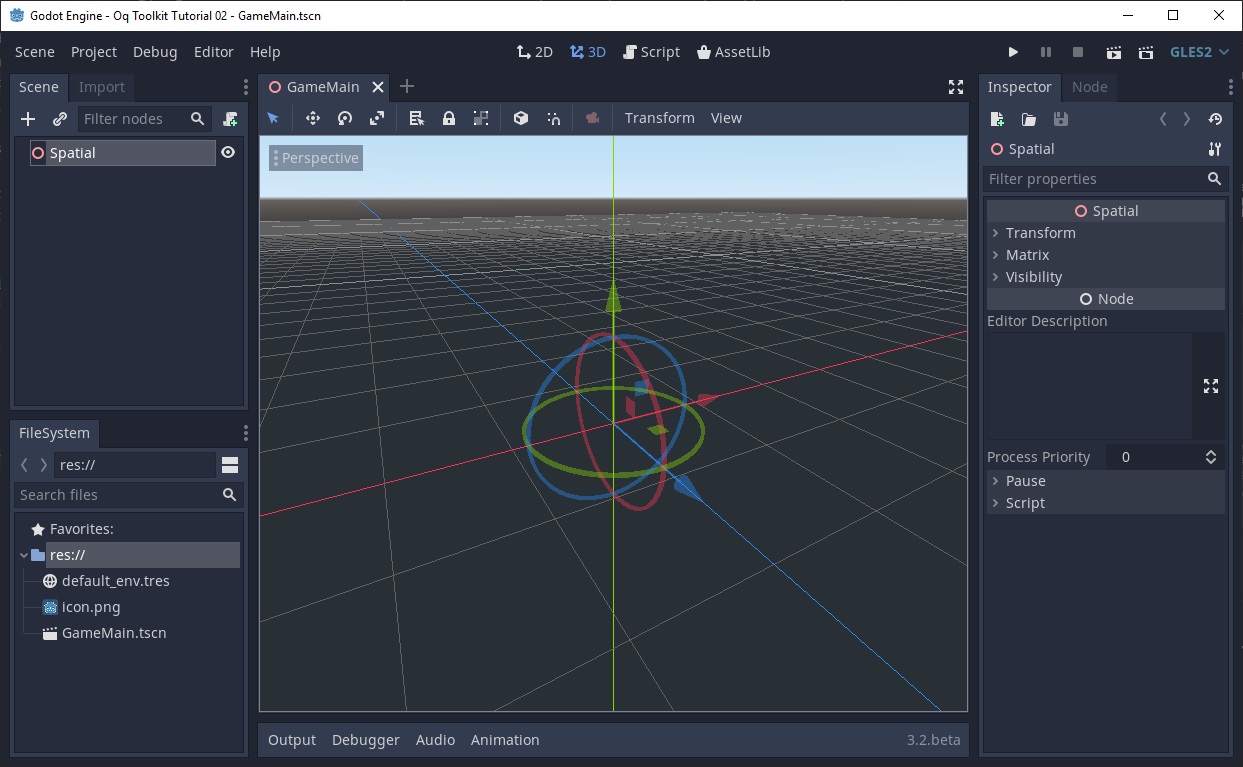
You now need to copy the necessary files from your downloaded godot_oculus_quest_toolkit folder into your project. You need to copy the following two directories: addons, and OQ_Toolkit.
Got to Project->Project Settings in Godot and open the AutoLoad tab. Select the path OQ_Toolkit/vr_autoload.gd re-name it to vr on the right side and click add. It should look like this:
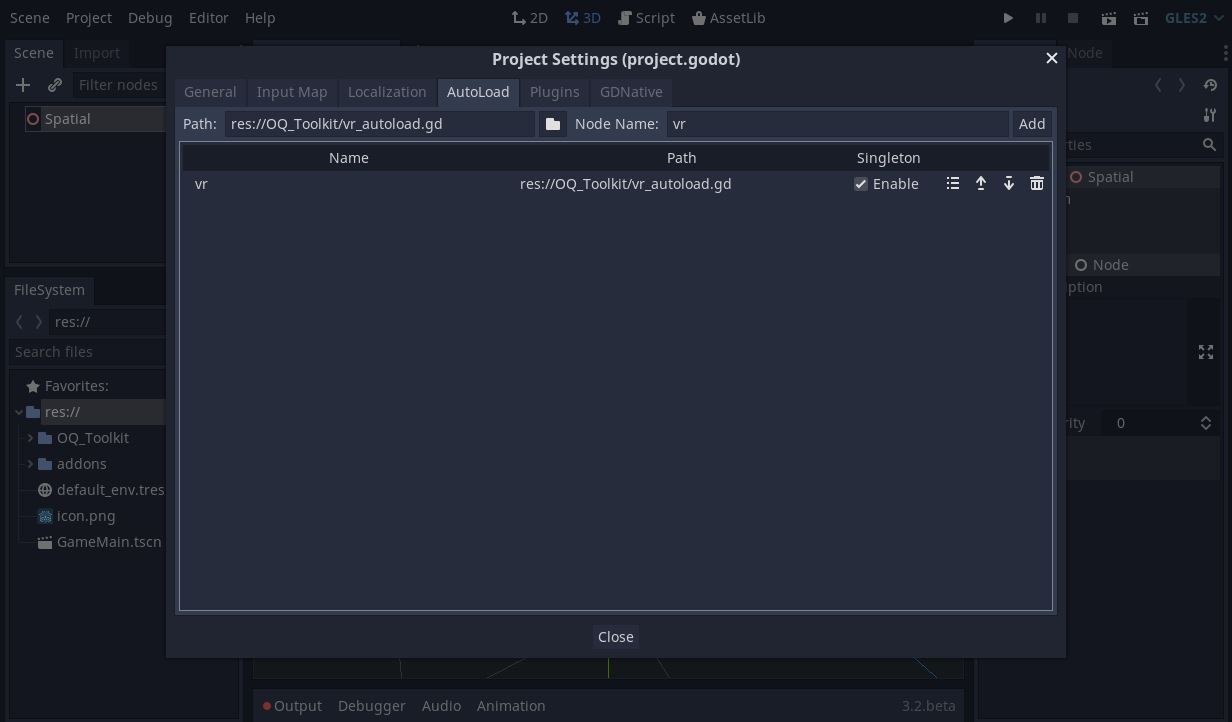
Click close to continue.
Got to Project->Export...; then click Add... and add a new HTML preset. If you want you can rename it to Web XR:
Depending on the browser you are targeting you may want to add a polyfill - copy the following into the "Head Include" section
<script src="https://cdn.jsdelivr.net/npm/webxr-polyfill@latest/build/webxr-polyfill.min.js"></script>
<script>
var polyfill = new WebXRPolyfill();
</script>
Now you are almost ready to go. You will just need to setup a minimal VR scene now.
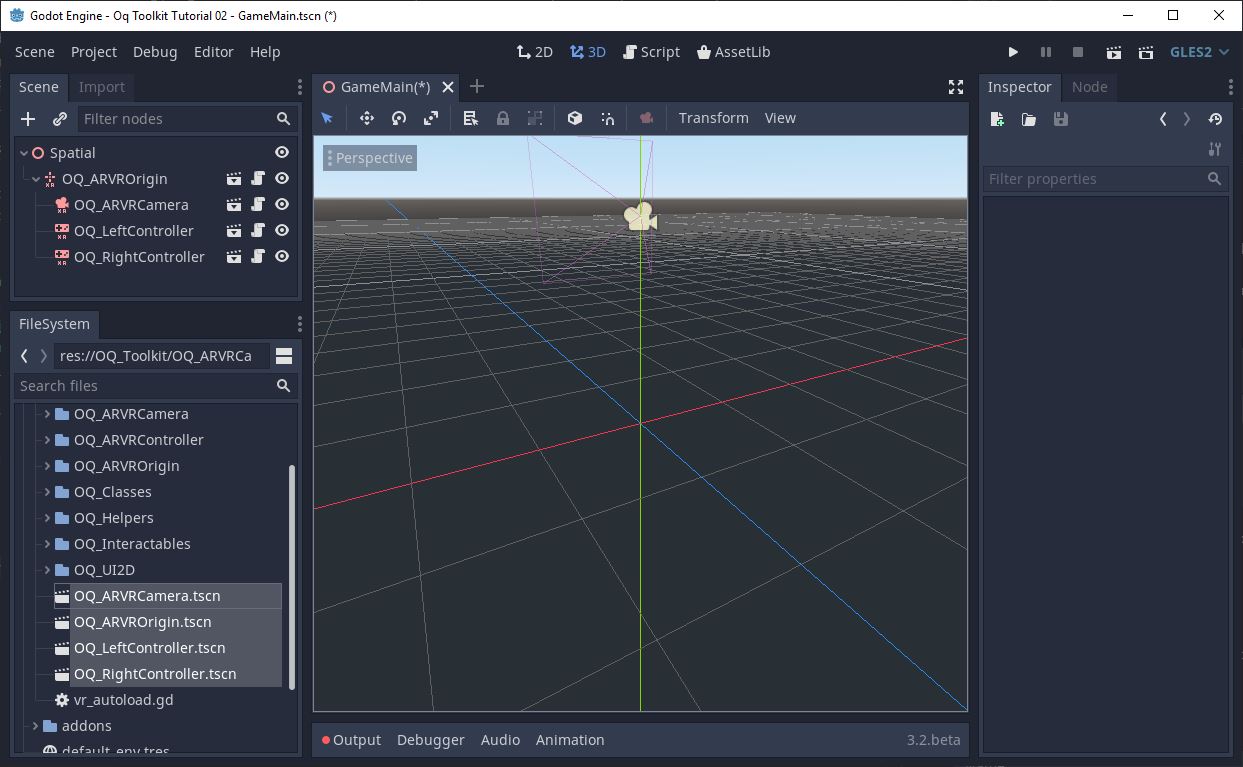
Navigate in the Godot FileSystem tab to the OQ_Toolkit, drag OQ_ARVROrigin.tscn onto your scene root node. Then drag OQ_ARVRCamera.tscn, OQ_LeftController.tscn and OQ_RightController.tscn onto your Origin. Make sure the scene tree looks like in the screenshot:
Next is to add the necessary initialization code as a script to your main scene: Right click on your root node (called Spatial in the scene) and select
Attach script. Then click create and the script editor will open.
In the _ready() function you need to add the line vr.initialize() as displayed here in the screenshot:
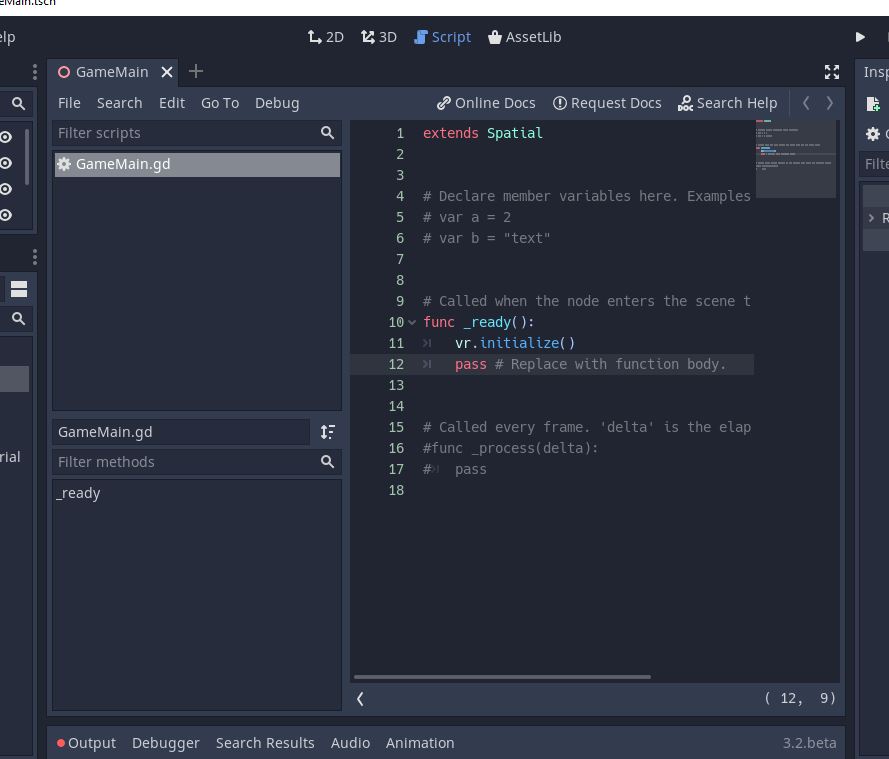
Afterwards you can switch back to the 3d view with the 3d button at the top. If you get an error that the autoload vr could not be found don't worry this will resolve if you restart godot (assuming you set it up correctly in the previous step).
Now your scene should work already in a supported browser (Chrome and Firefox are best for this). You can try to deploy it using the HTML 5 icon on the top right.
When first launching your new project godot will ask for a main scene. Select your GameMain.tscn that you created.
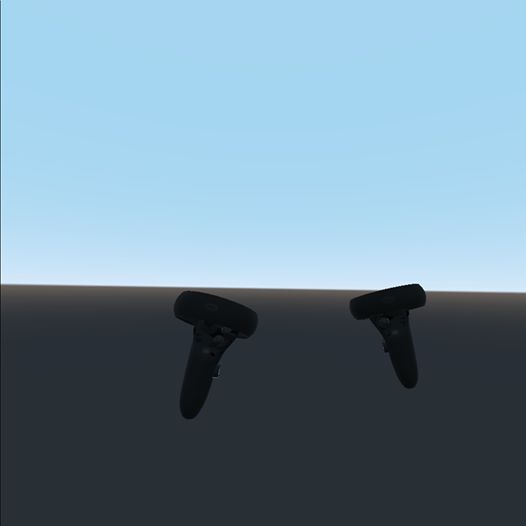
You should see your two controllers and the sky in the background:
First export the HTML 5 project build from Godot - you could save it to a /build/webxr directory as index.html
You can follow the instructions on this page to setup a simple https server - a modified version is shown below:
If you use node you can simply open a terminal and install browser-sync by running:
npm i -g browser-sync
And then go to the directory where you exported your WebXR app and run:
browser-sync start -s --https --no-open --port=5001
The console output will show you the address to use to for external access - something like https://192.168.x.x:5001
Copy this link and head over to hmd.link
Click the Add Link button and paste the URL you copied above
Put on your headset and head over to a browser, enter the URL hmd.link
Click the link you to access your https server
The browser will complain that the website/certificate is untrusted. Click "Advanced" (or similar) and choose "Accept Certificate" or "Proceed" - this is safe, you are just accessing your own PC on your own network
NB: If the steps above fail do check that both your PC and your headset are on the same WiFi network.
You'll see a loading screen and then two buttons: "Enter VR" and "Simulation" click the VR button and your browser will ask you to accept an immersive session. Accept and enjoy!