-
Notifications
You must be signed in to change notification settings - Fork 39
Tutorial 02 Basic Project
If everything in Tutorial 01 Setup was successful setting up your own project can be done with the following steps.
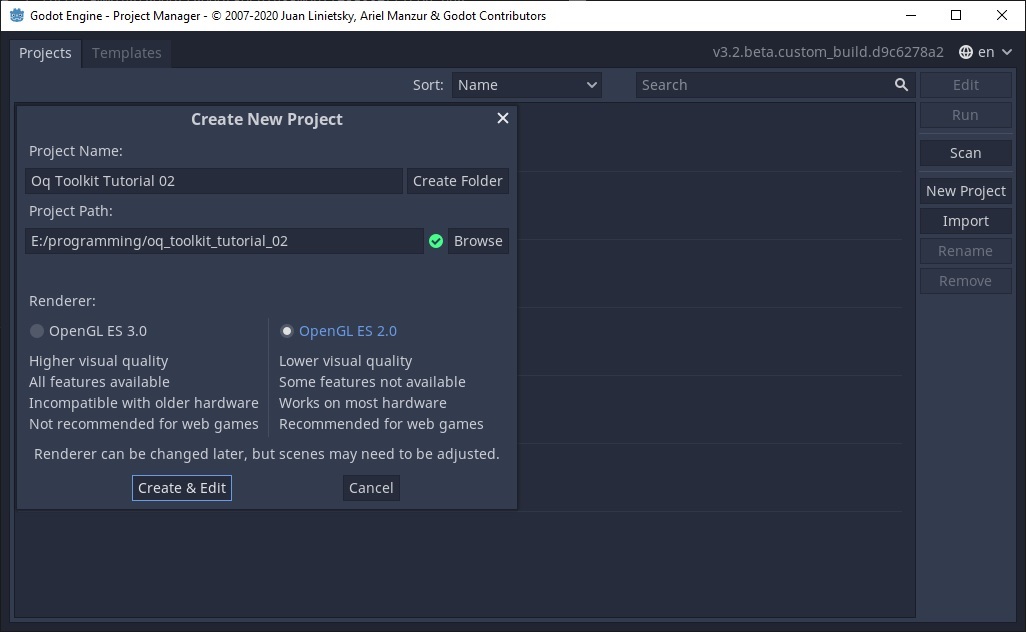
First create a new project using the Godot Project Manager selecting OpenGL ES 2.0 as Renderer:
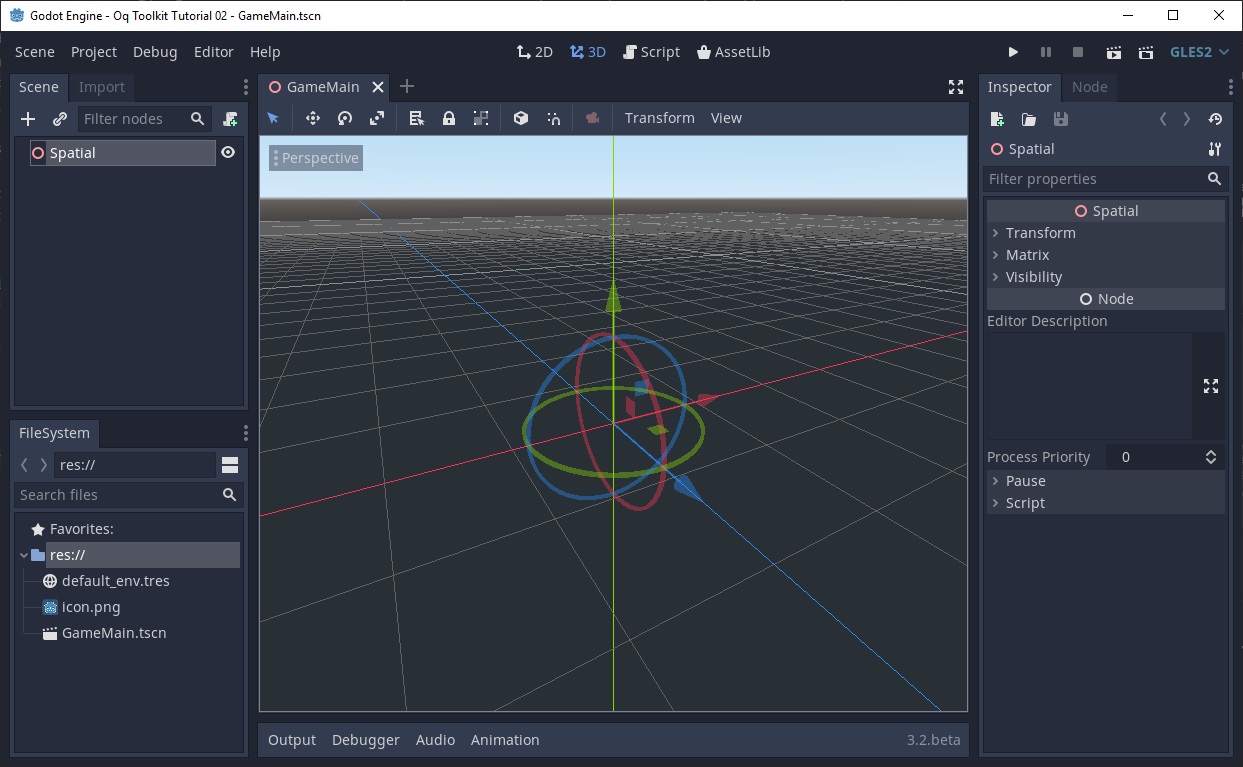
Create a 3D Scene as root node and save it GameMain.tscn:
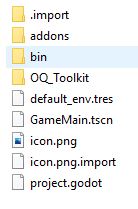
You now need to copy the necessary files from your downloaded godot_oculus_quest_toolkit folder into your project. You need to copy the following three directories: addons, bin and OQ_Toolkit.
Your folder structure should now look like this:
If you are curious what these folders contain here is a short explanation:
The addons folder contains the godot_oculus_mobile plugin which is necessary for godot to use the Quest as a VR device. It also contains the necessary function bindings to call the oculus mobile API from GDScript.
The bin folder contains a prebuild godot for android. This is your export template
The OQ_Toolkit folder contains all the scenes and scripts that make up the toolkit.
Got to Project->Project Settings in Godot and open the AutoLoad tab. Select the path OQ_Toolkit/vr_autoload.gd re-name it to vr on the right side and click add. It should look like this:
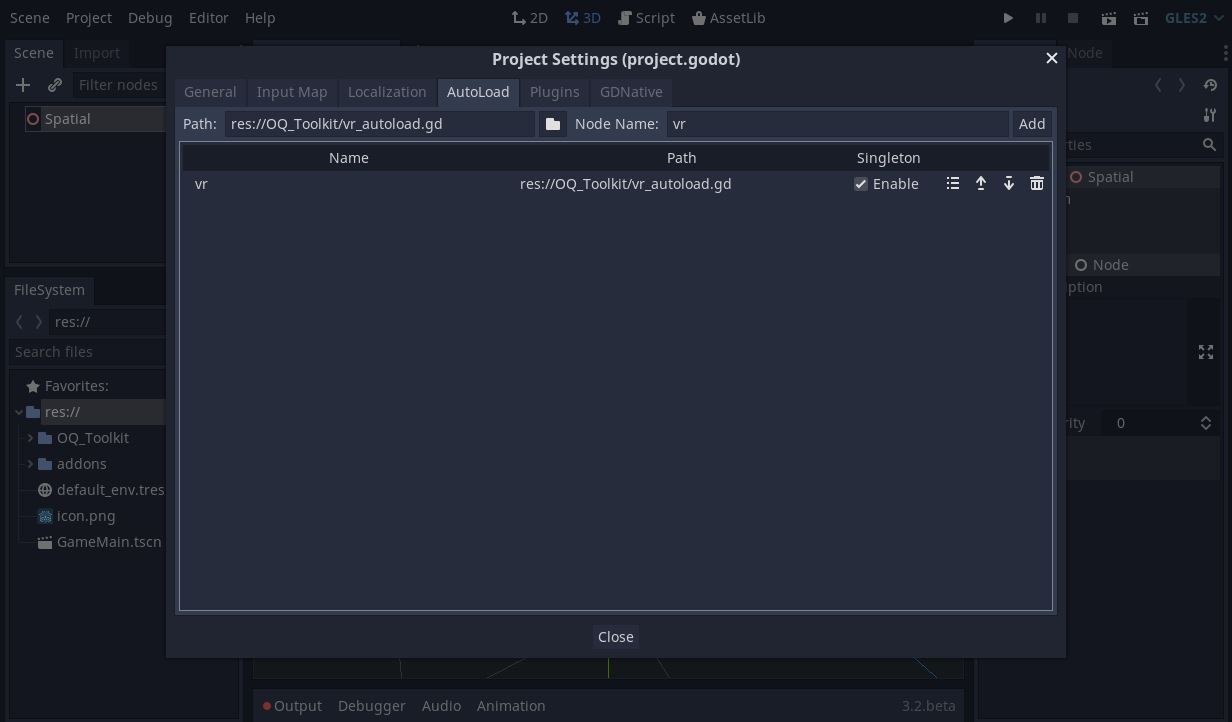
Click close to continue.
Got to Project->Export...; then click Add... and add a new Android preset. If you want you can rename it to Oculus Quest:

Now you need to adjust your export settings to allow for VR support on the oculus quest. Change to the following settings:
- XR Mode --> Oculus Mobile VR
- Degrees of Freedom --> 6DOF
Under Custom template - Debug select the godot apk from the bin folder you copied:
- Debug --> bin/android_debug.apk
The result should look like this:
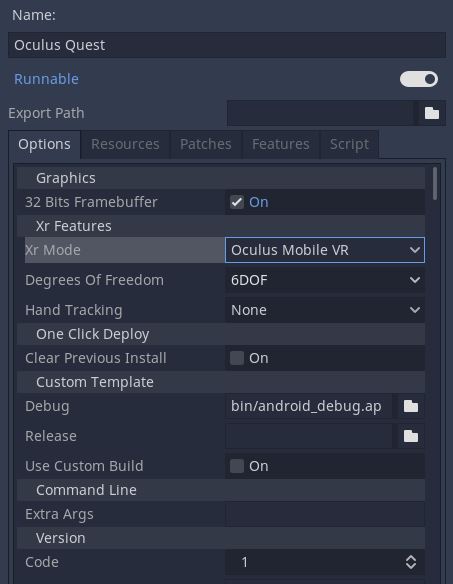
Now you are almost ready to go. You will just need to setup a minimal VR scene now.
Navigate in the Godot FileSystem tab to the OQ_Toolkit, drag OQ_ARVROrigin.tscn onto your scene root node. Then drag OQ_ARVRCamera.tscn, OQ_LeftController.tscn and OQ_RightController.tscn onto your Origin. Make sure the scene tree looks like in the screenshot:
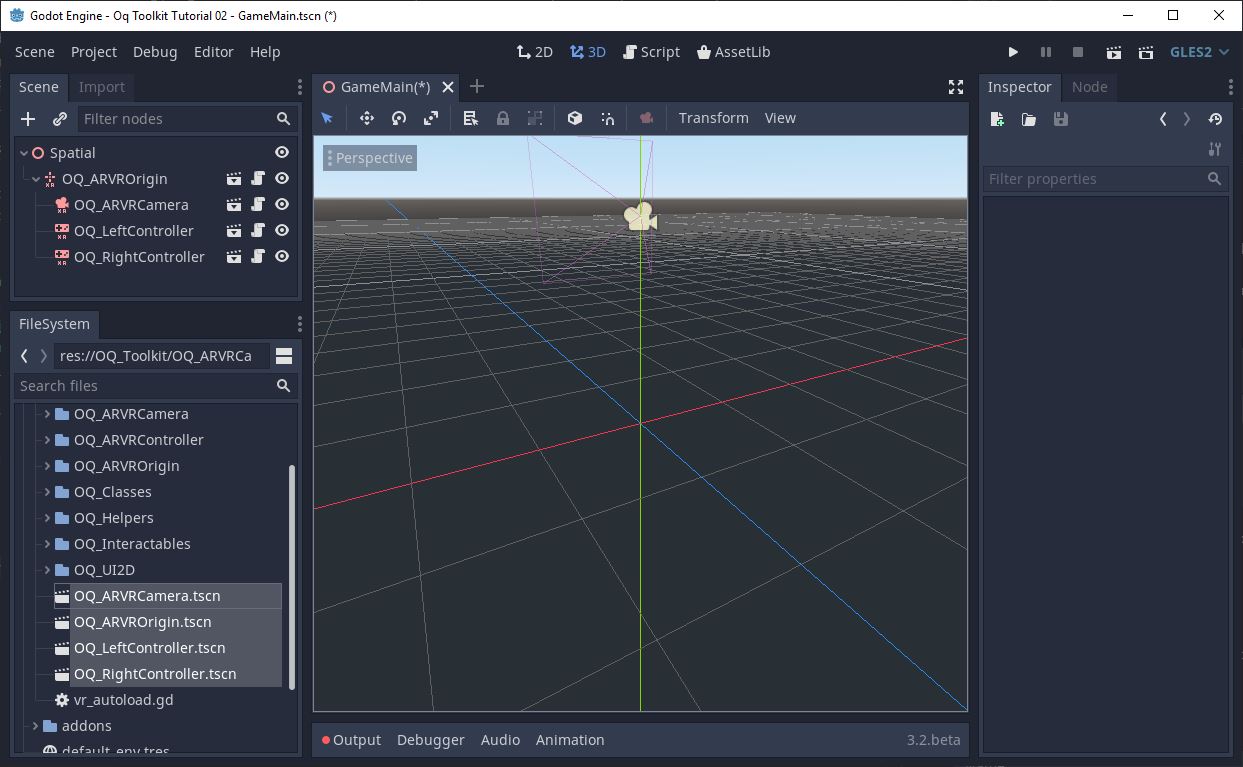
Next is to add the necessary initialization code as a script to your main scene: Right click on your root node (called Spatial in the scene) and select
Attach script. Then click create and the script editor will open.
In the _ready() function you need to add the line vr.initialize() as displayed here in the screenshot:
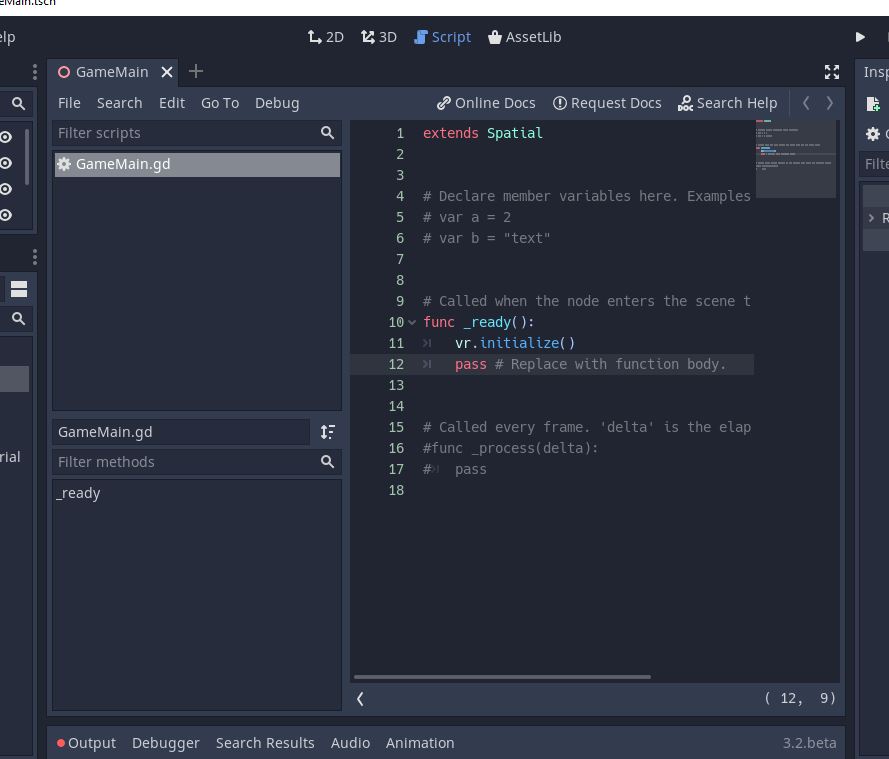
Afterwards you can switch back to the 3d view with the 3d button at the top. If you get an error that the autoload vr could not be found don't worry this will resolve if you restart godot (assuming you set it up correctly in the previous step).
Now your scene should work already on the oculus quest. You can try to deploy it using the android icon on the top right.
When first launching your new project godot will ask for a main scene. Select your GameMain.tscn that you created.
You should see your two controllers and the sky in the background:
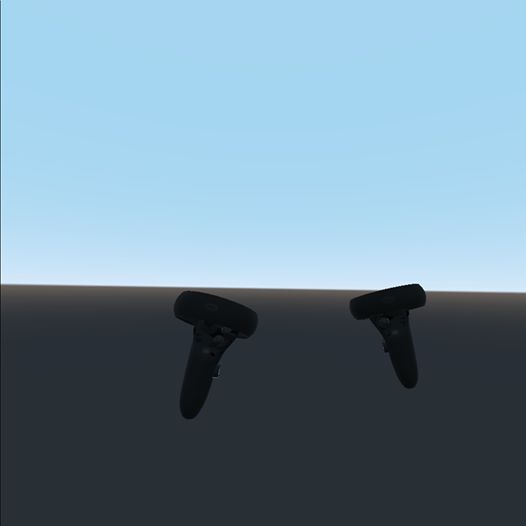
To add some more interesting geometry to the scene you can use any 3d model that Godot can load. For example the .gltf format models from sketchfab.com usually work really well. For the example here I used https://sketchfab.com/3d-models/low-poly-room-blender-tutorial-6c6f589b7db14e8f8bbee6daac5e8213
Download the model in .gltf format, unzip it into your project folder and switch back to godot. Godot will import the .gltf file.
- Drag and drop the .gtlf file from the godot file explorer into your 3D viewport.
- You will need to reset the position to (0,0,0) so select the new scene node on the top left
- on the right in the inspector change the Translation to (0, 0, 0):
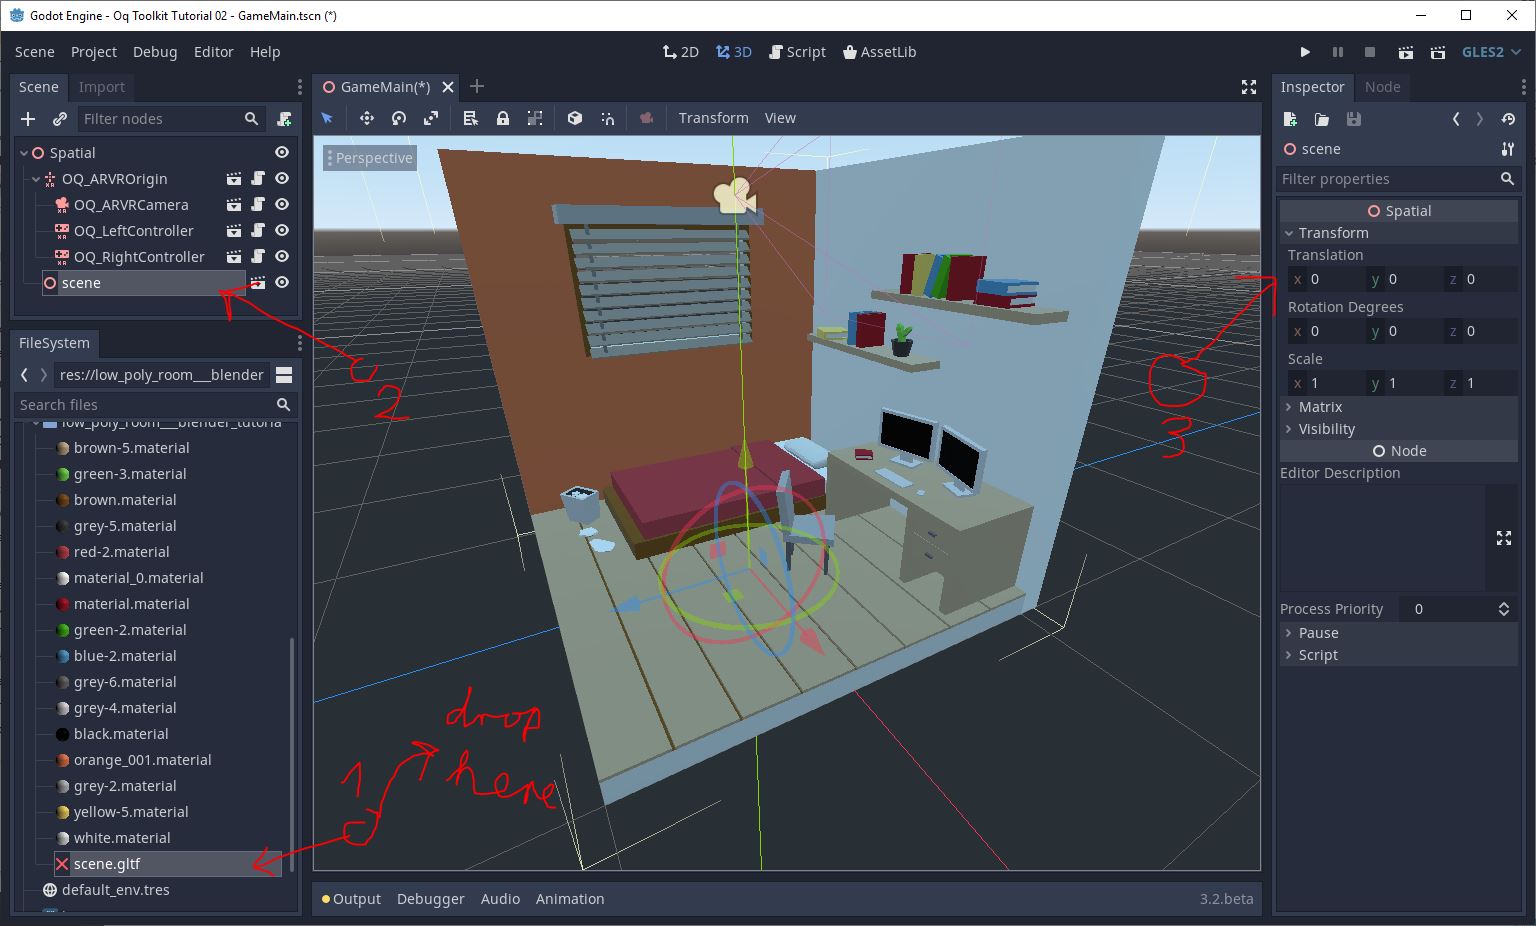
Done. You can now view the (slightly too small) scene directly in you headset. It should look like this:
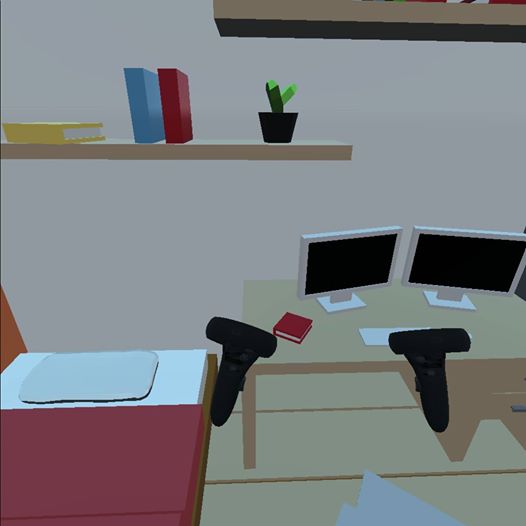
If you want you can now adjust the scale of the room in the inspector to be closer to real world size by setting it to (2, 2, 2).
Have fun!