Jetson Nano: Setup for Federated Learning written by Jess
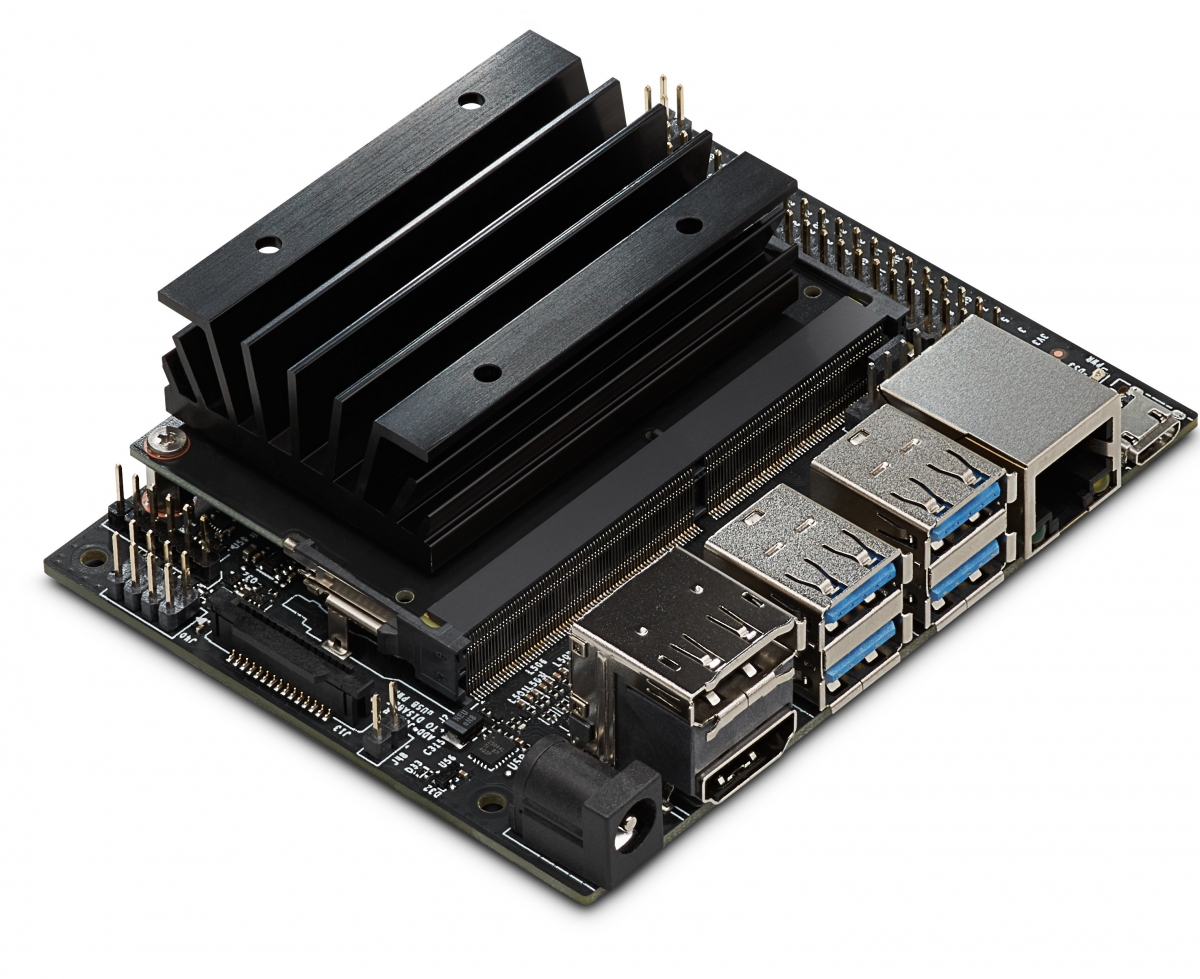
Jetson Nano
OpenMined has a tutorial for deep learning on the Raspberry Pi, which our team replicated. I have been interested in nVidia's Jetson Nano, marketed as "built for AI" applications. So, I decided to try working with a Jetson Nano for the first time and implementing the tutorial on this device.
I was not able to get the equipment in time for the Showcase Challenge because I didn't realize that I would need a 2 pin jumper and setup is not possible without it. However, I have written this short guide for those new to the Nano to get setup without trouble so that they can experiment with PySyft on the Jetson Nano without running into similar problems!
Federated Learning on MNIST using a CNN
- only 1 Nano is needed to implement federated learning locally with Virtual Workers in PySyft
Federated learning using websockets - MNIST example
- more than 1 Nano is needed to implement federated learning with Websocket Client/Server
Laptop/Computer with internet access
- A Windows 10 laptop was used for this project
- Internet connection was "average" speed
microSD card
- at least 16 GB (64 GB Kingston microSD card was used for this project)
USB keyboard and mouse
Computer display (either HDMI or DP)
Micro-USB power supply (5V⎓2A)
DC barrel jack power supply
Micro-USB cord that can transmit data
- Download software
- Download Jetson Nano Developer Kit SD Card Image
- Download SD Memory Card Formatter for Windows
- Download Etcher
(It takes about 8:22 minutes to download the software.)
- Format the microSD card using SD Memory Card Formatter
- Select card drive
- Select “Quick format”
- Leave “Volume label” blank
- Click “Format” to start formatting, and “Yes” on the warning dialog
(It takes about 1:40 minutes to extract/install the software and format the microSD card.)
- Write the Jetson Nano Developer Kit- JetPack SD Card Image to your microSD card using Etcher
- Click “Select image” and choose the zipped image file downloaded earlier
- Insert your microSD card into the laptop/computer if not already inserted
- Click "Cancel" if prompted to format the card at this point
- Click “Select drive” and choose the drive with the microSD card
- Click “Flash!” to write and validate the image if your microSD card
- Click "Cancel" (again) if prompted to format the card
- Remove the microSD card
Issue: I got an error "The writer process ended unexpectedly." when using Etcher. Resolved by running as administrator.
(It takes about 6 minutes to write the Jetson Nano SDK image to the microSD card.)
- TensorRT and cuDNN for high-performance deep learning applications
- CUDA for GPU accelerated applications across multiple domains
- NVIDIA Container Runtime for containerized GPU accelerated applications
- Multimedia API package for camera applications and sensor driver development
- VisionWorks and OpenCV for visual computing applications
After the JetPack SDK has been flashed to the microSD card, it can be removed from your computer/laptop and inserted into the microSD slot of the Jetson Nano. At this point, you can connect a keyboard, mouse, and monitor. Once the Nano is powered on, Ubuntu installation will start automatically (after a few seconds). You will be prompted to setup basic information such as a username, computer name, password, language, and location. Then, Ubuntu will be installed.
However, you will first need to install some additional tools using "headless" configuration.
The Jetson Nano Developer Kit does not include a wifi card, which means that you can install additional deep learning tools via (1) direct ethernet connection or (1) connecting the Nano directly to a computer that is connected to the internet. The second option is termed "headless" and that is the configuration used in the nVidia training guide for setting up deep learning tools.
There are two options for powering the Jetson Nano: the microUSB port or the barrel jack. The same type of microUSB used to power the Raspberry Pi can be used to power the Nano. However, deep learning requires a lot of power and nVidia strongly suggests using the barrel jack for those types of applications. Additionally, in headless configuration, the microUSB port will be used to connect the Nano to your computer via a microUSB cord that can transmit data. So, you need to power the Nano via the barrel jack connector.
You will need to cover the J48 pins with a 2-pin jumper. Otherwise, the barrel jack connector will not work.
Suggested brands of microUSB power supplies:
- Adafruit 5V⎓2.5A Switching Power Supply with 20AWG MicroUSB Cable (GEO151UB-6025)
- GeekPi 5V⎓2.5A GeeekPi Power Supply with ON/OFF Switch (ABT025050)
- Pwr+ 5V⎓3.5A Pwr+ AC Adapter TBAM3-UL (PWR-TA05035N) (also available from Amazon)
- Raspberry Pi 5.1V⎓2.5A Raspberry Pi Universal Power Supply (DSA-13PFC-05 FCA 051250)
Suggested brand of DC barrel jack:
- Adafruit 4A @ 5V power supply
"Advanced" option: One user suggested that it's possible to power the Nano using 5V input pins available on the 40-pin header. Specifically, if you "want an integrated solution for higher-voltage power sources, Auvidea's JN30 carrier board for Nano supports 12-48V DC input".
At this point, you are ready to replicate the OpenMined tutorials on the Jetson Nano!