-
Notifications
You must be signed in to change notification settings - Fork 4
II.7.a. Bans
To ban a user, you have to be logged in, and your access level must be at least MODER, but higher than the access level of the user to be banned.
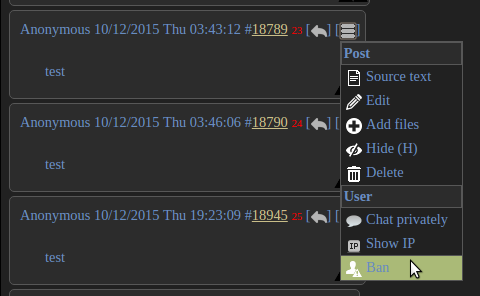
To ban a user for a post, select click the post menu and select "User --> Ban", as shown below:

Alternatively, you may go to /manage.html page and click New ban... (you will have to enter user IP address in that case).
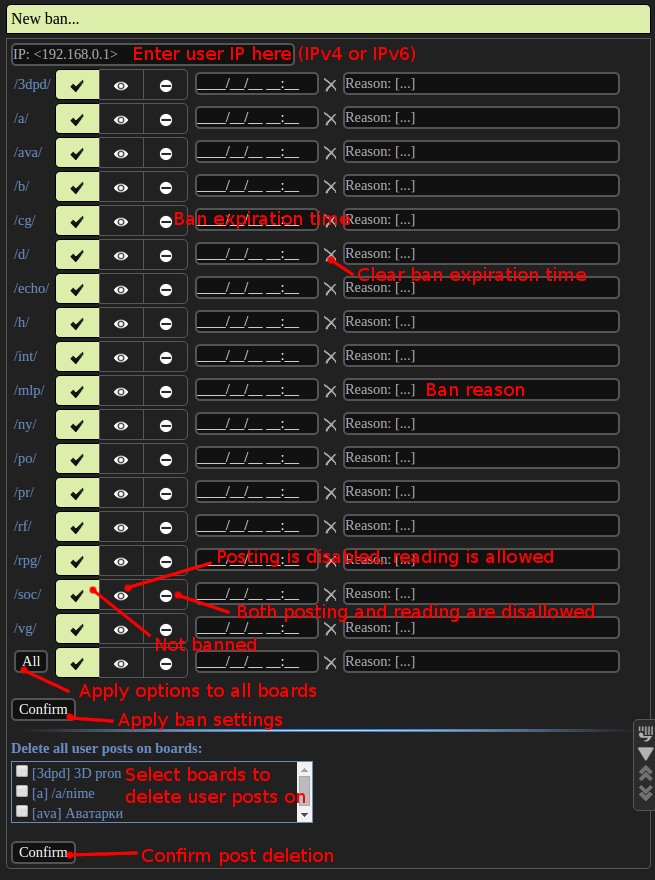
To assign a ban, select ban levels on each board, specify ban expiration time (or leave as is for the ban to last forever), specify the reason, and then click "Confirm". To set the same ban information for all boards, fill the very last row of the table and click "All" button in the first column of the row. You may also delete all user posts on the selected boards. See the example below:

After a user has been banned, you will be able to edit ban information on the /manage.html page. Select a user by clicking, edit the ban information, then click "Confirm". If you decide to remove the ban, just select "Not banned" ban level for all boards, and then click "Confirm". If you reload the page now, the edited entry will not be present anymore. Alternatively, you may remove it with the "Remove" button without reloading the page. The entry is not removed automatically to allow you change your decision and reassign ban information.
To ban a large number of users, misc/bans.json file may be used. You have to create the file yourself. See misc/bans.json.example for an example.
Bans affect board, thread, catalog and archive pages only. Banned users will be able to view other pages, such as /markup.html or the homepage. Use a web-server (such as nginx) if you wish to fully deny access for some user.
-
READ_ONLYban level indicates that a user will be able to read posts only. -
NO_ACCESSban level indicates that the user will not be able event to visit a board, thread, catalog or archive pages of the corresponding board (an error message will be shown to him).